DSAR - Requestors Configuration
Overview
DSAR configuration screen can be used to define different types of requestors for the tenant. You can differentiate the privacy portal settings and various other configurations like the flow, act, etc., based on the requestor types too. The number of requestor types can vary depending on the nature of the business. Moreover, sub-requestor types can be created to allocate different requestor types under a main type.
For choosing an existing requestor,
Log in to the Data Governance Tool.

Once logged in, the Data Governance Tool displays the Main Screen.
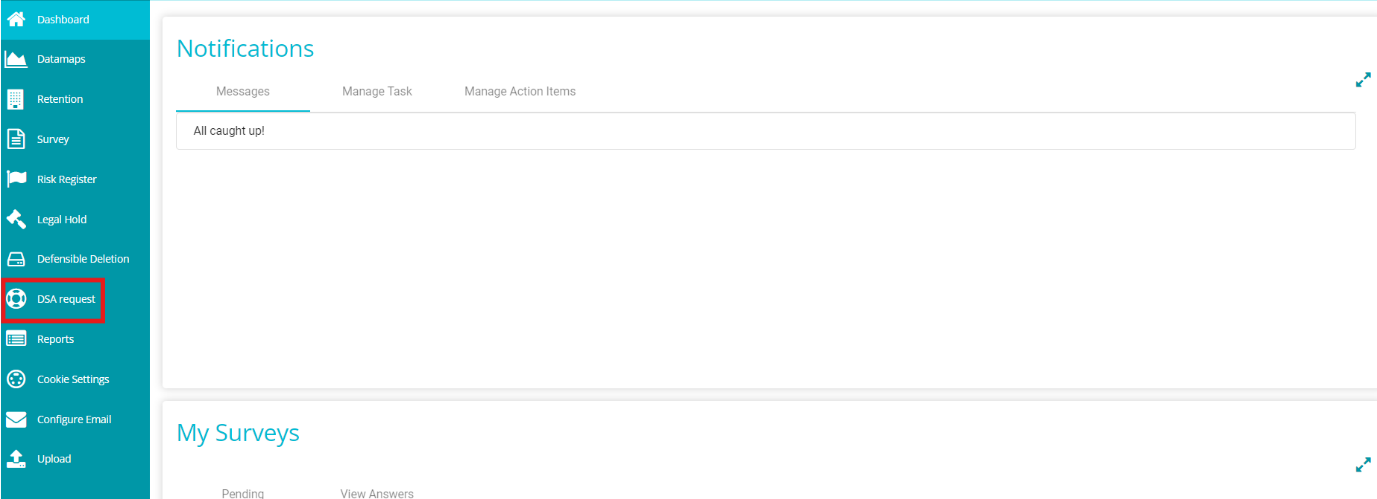
Navigate to the DSA Request module on the hamburger menu.

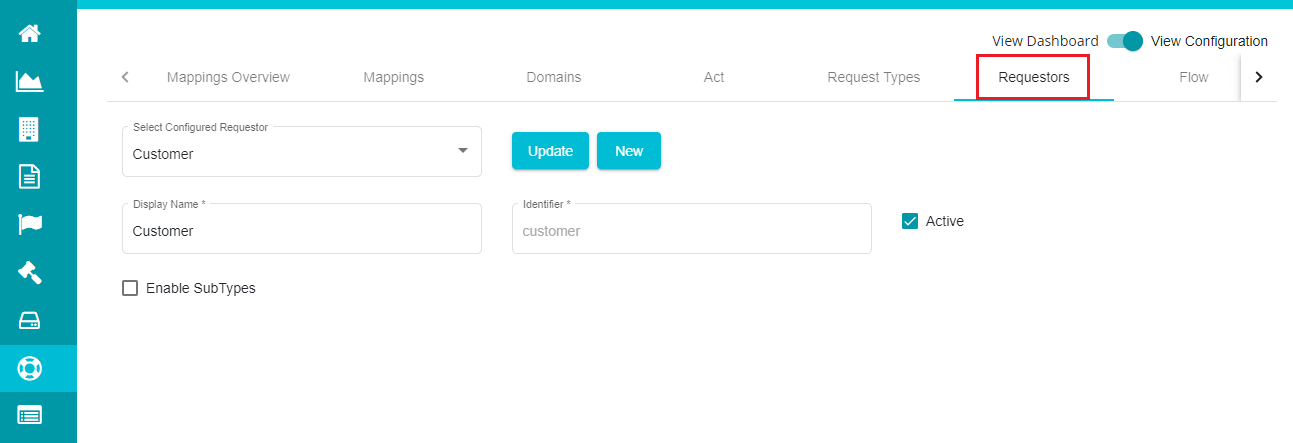
Toggle the 'View Dashboard' button to 'View Configuration' to see the DSAR configurations.

Go to the 'Requestors' tab.

Click on 'Select Configured Requestor' to open the Requestors drop-down menu.
Select any of the requestors from the menu.

Configuring a New Requestor
Under the 'Requestors' tab, click the
button present next to the Select Configured Requestor dialog box.
Type the name in the 'Display Name' dialog box.
Enter the 'Identifier'.

Display Name -- the name used for display purposes, through which you can identify the requestor. Display name can be defined however you like, irrespective of the letters' case. You can also use special characters if needed.
Identifier -- This is used to identify the requestor in the backend.The identifier must be unique, meaning it cannot match any other requestor's identifier, and it must be in lowercase letters only.Special characters, symbols, or uppercase letters are not allowed.
Note: Display Name and Identifier cannot be left blank when configuring a requestor.
Mark the
button after entering the required details.
Click the
button present next to the Select Configured Requestor dialog box.
Configuring Sub-types for Requestors
Apart from the requestors, you can also enable sub-types if you want to define any sub-types under the main requestor type.
Note: If you don't want any sub-types to the Requestors, uncheck the "Enable Sub Types" option and tap the "Create" button directly.
- To define sub-types,Check the 'Enable Sub Types' option under the Display Name dialog box.
SubTypes -- The screen displays various possible sub-types for a specific requestor. You can manually add sub-types and press Enter to confirm. To add more sub-types, separate them with commas, then press Enter to confirm. Sub-types must only contain alphabets.
Placeholder -- There are two placeholders: tenant and request type.When selecting the tenant, you are placing the tenant's name with the placeholder on the question label. This is more appropriate for the Requestor type configuration in DSAR.
Question Label -- this is the text that would be displayed to the users, to select from different sub-types within a request when they fill a request form. Usually, the placeholder is included in {} so that it replaces the tenant or request type on the request form.

Click the necessary sub-type from the Sub Types list and select the 'Placeholder' for it.
Define the 'Sub Type Question Label.'
Note: Placeholder is a temporary or default value displayed in forms or configurations to indicate where specific information is required. For instance, placeholders like "Tenant" and "Request Type" direct users to provide details such as the organization they belong to or the type of request they are submitting.
- Click the
button present next to the Select Configured Requestor dialog box.
Note: You can configure the Welcome Screen for different requestors with necessary inclusions and modifications. The validations vary based on the chosen requestor for each form.
Mapping the Requestors to the Tenant
Go to the DSAR Configuration homepage.
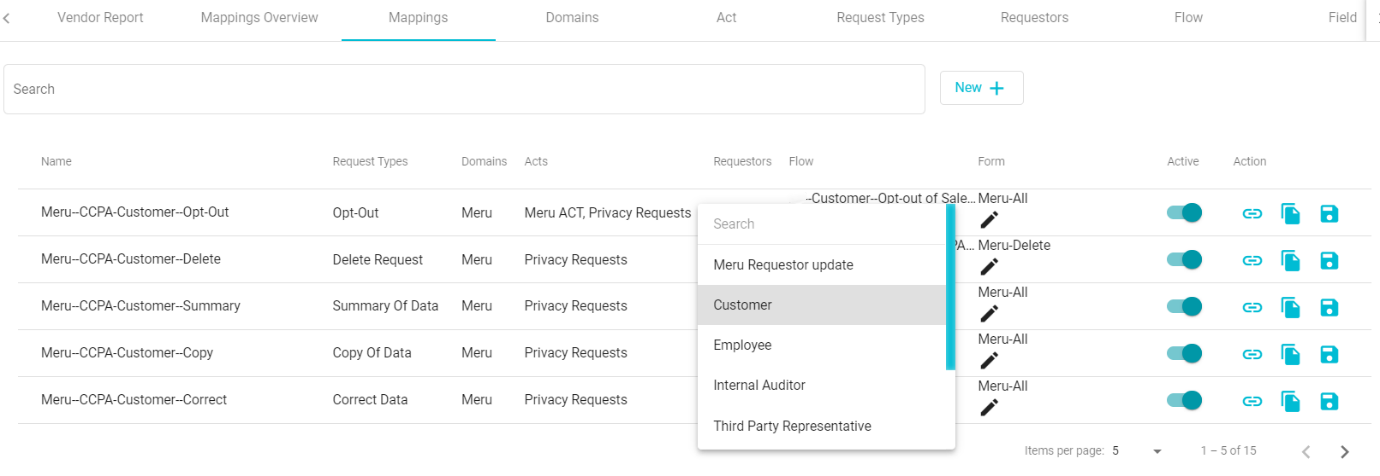
Click the 'Mappings' Tab.
Click the drop-down menu under the 'Requestors' tab. You can find the created requestor in the drop-down menu along with the pre-defined ones.

select the required requestor from the menu.
Check the Active
icon after making the selection.
Tap the Save
icon.
Note: It is not necessary that you must map the requestor to the tenant whenever you define a sub-type. You can just update the sub-types and see the changes in the request form immediately.
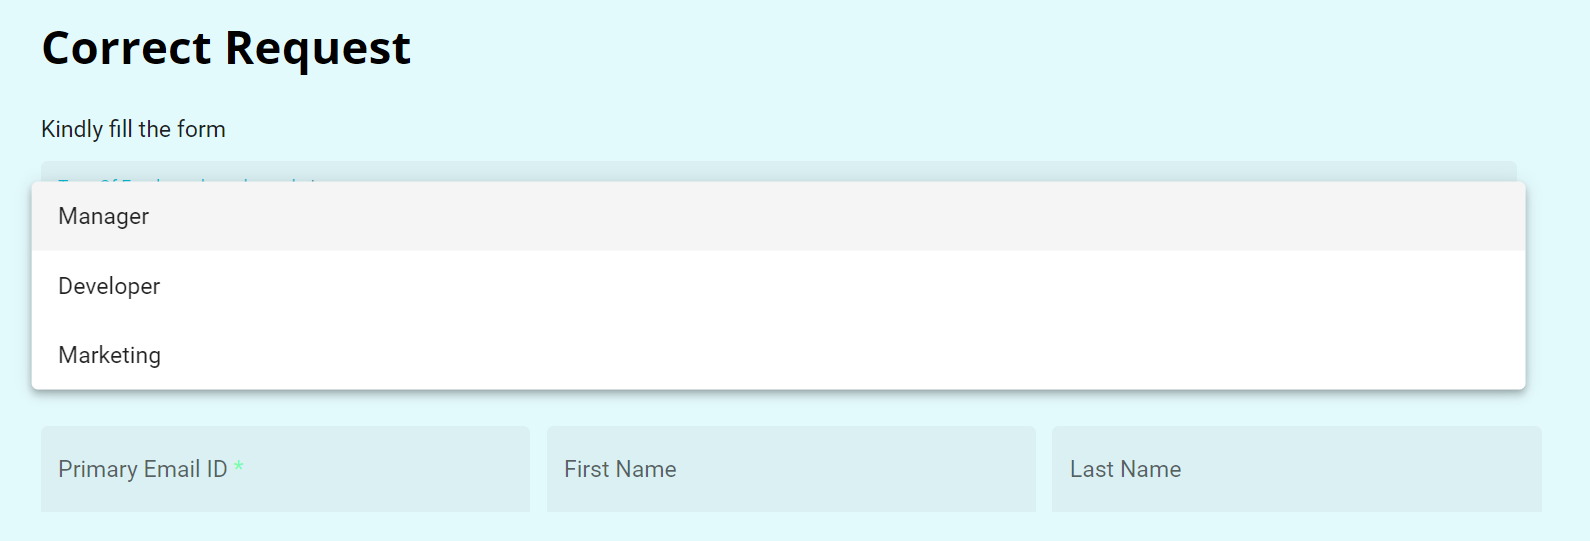
For example, if the requestor type is "Employee," and the employee wants to submit a request through the company's privacy portal link, the form will prompt the employee to specify their role within the organization. This is based on the subtypes configured for the "Employee" requestor type. The available subtypes (such as "Manager," "Marketing," "Developer" etc.) would be presented to the employee in the form. The employee would then select the most appropriate subtype, which helps categorize the request and ensures it is processed according to the employee's role or position within the company.
